Яку теплу підлогу вибрати для балкону?
If earlier the balcony was analogous to a storage room where seasonal household items were stored, now it is increasingly being turned into a lounge area, making a balcony or loggia a charming winter garden, or an office, or a compact gym. If the apartment has two loggias, the question of choice does not even arise, and the living space increases due to additional square meters.
However, there is one significant problem - the room needs to be heated. The best solution is to make a warm floor on the balcony. This task is not as difficult as it may seem at first glance. If you follow all the technological rules and carefully choose a warm floor on the balcony, you can do it yourself.
There are several types of heating systems on the market: Types of heating mats: They are easy to install yourself in a «wet» way. What is its essence?
The substrate for heating mats is a concrete surface or old tiles. Due to the fact that no additional preparatory work is required, the task of laying the mats is quite simple and budget-friendly.
First, you need to spread the glue over the entire surface. It takes about 7 days for it to dry completely. Laying insulation material will reduce heat loss.
Next, the heating mat is cut into separate fragments (do not touch the cable!) and laid on the floor. A thermostat is installed, the system is connected to the mains.
Granite tiles are laid on the mat for fixing.
The advantages of this type of system: Cable underfloor heating on a cold balcony should be installed only after it has been insulated and modern insulating windows have been installed. Otherwise, heat energy will «warm» the street. If a cement-sand screed with a thickness of 45 mm or more is not made, there is no insulation and waterproofing, the cable system will heat the ceiling of the loggia/balcony from below. Couplings are installed in the screed, the location of which should be planned before starting work. Next, the mounting film is laid, and on it - a wave-shaped cable with a bending radius of at least 10 times the cable diameter. The nodes must not intersect! Fixation is carried out with a mounting tape.
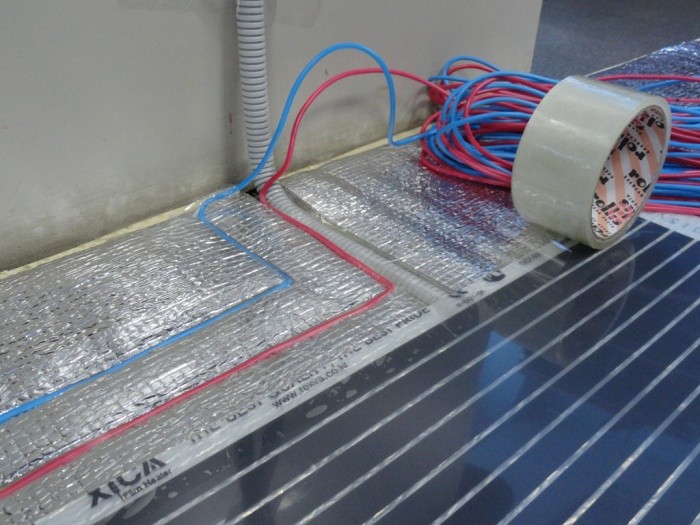
The most effective top layer is tile, characterized by high thermal conductivity. This system is the best of all the variations of underfloor heating on the balcony and under linoleum. Multiple heating cables can be connected to one thermostat. It will take at least 3-4 weeks for the screed to dry completely – you need to take this factor into account before starting installation. Benefits: The infrared system is the so-called carbon strips (film elements) that are soldered between layers of lavsan or polyester. The strips themselves are a carbon paste made of crushed carbon fiber. The material for the conductors is copper or its alloy with silver. The strips are connected to the conductors in parallel. The mains voltage is standard - 220 W.
When installing an infrared film on the floor, you must follow a clear sequence of actions.
What is a water floor heating on a balcony? These are batteries placed over the entire surface of the floor, through which hot coolant is transported. To enhance the efficiency of this system, a foil with heat-reflective characteristics or high-density foam is usually laid on the waterproofing layer.
Installing a water floor involves the following steps: Given that this system significantly weighs down the floor, it is not recommended to install it on balconies: this can lead to its collapse. Experts recommend installing a water floor only on loggias.
Due to the variety of «warm floor» systems, it is easy to choose the option that will be optimal in terms of cost, performance and technical capabilities.
In which cases will the heating system be the most effective?
Heating mats
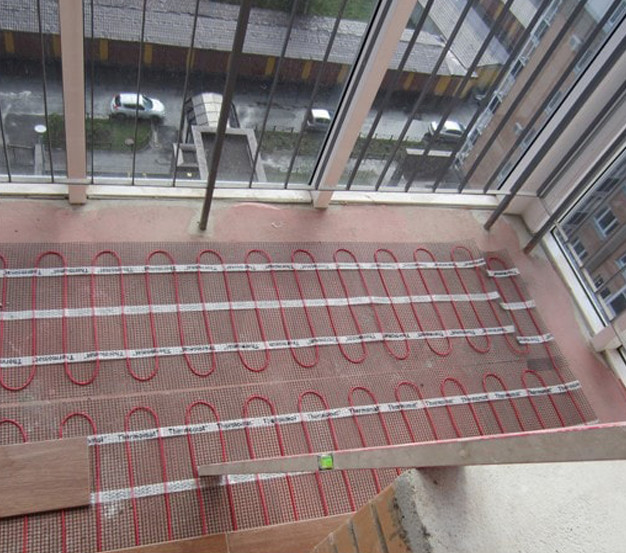
Heating mats for the floor – this is a mesh made of fiberglass (fraction size 10x10 mm), to which a high-resistance resistive cable with a diameter of 2-3 mm is attached, laid with a snake. The pitch of the snake is from 50 mm.
Disadvantages:
This electric underfloor heating on the balcony acts as an element designed to supplement the amount of heat radiated by the main source. Usually, this is the case when it is impossible to make a cement-sand screed, the system is installed in an old house, there is a time limit.
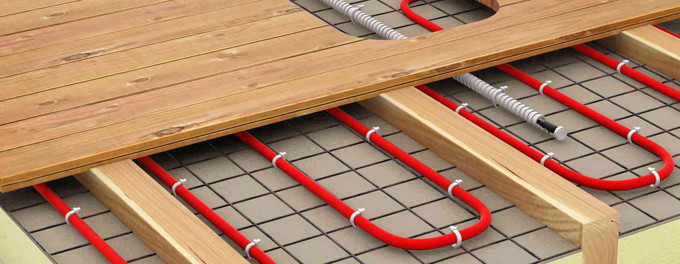
Heating cable
The heating element of this system is a cable heating section, which is based on a two-core shielded cable with a specific heat emission of 18 W/m. It is connected to the heating core on the one hand and to the supply conductor protected by a sleeve on the other. The system, which is capable of providing t=+250+3500, is controlled by electronic thermostats.
Disadvantages of an electric underfloor heating on the balcony:
Infrared film for floor heating on the balconyThe functioning of the infrared floor film is based on the ability to form long-wave thermal radiation. Its greatest advantage is the accumulation of heat, its secondary return and partial heating of the walls of the balcony/ loggia.
Perform a screed.
When insulating the floor on the balcony with an infrared film it must be borne in mind that a hard finish requires a hard substrate, and a soft one (linoleum, carpet) – vice versa.Water floor heating on the balcony
Installing water floor heating on the balcony is a very attractive idea, but there are a number of significant limitations. One of them is that the room and the loggia should have the same floor level.
Only seamless metal-plastic pipes can be used. For a balcony of a small area, the ideal option for placing the route is a snake scheme. It is necessary
Before concreting the route with the coolant, you need to conduct testing to make sure there are no leaks.
Is it possible to make a water floor on the balcony, how much will it be the right decision?